This Vlog is for new DIY installers, it will explain some basic information about how to set up the Car’s Original screen UI menus, on an android screen that you may have purchased from us.
I will now assist you with the basic steps involved, to enable and display the original menu options on an android based screen in a Premium Car.
WATCH THIS VIDEO BELOW FOR THE 5 USEFUL TIPS & TRICKS WHILE INSTALLING CARBON FIBER TRIMS IN A CAR

The integration and setup of the car’s existing original UI, like the menus and functions, on a new android based touchscreen upgrade, can be performed while, test connecting all the equipment during installation, or after completing the final fitment and panel installs, depending on the car in question. Once the screen starts up, and the menus load on the android touchscreen, you will have a widget on most main menus called, Original UI, or Audi MMI, or Car Info, or NTG Mode, depending on the brand and model of the car.


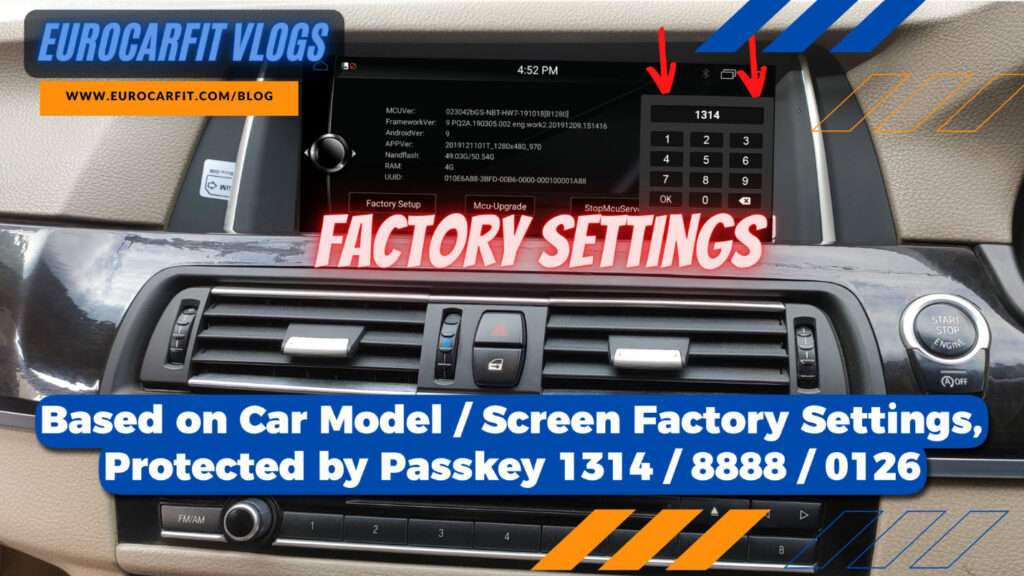
In one scenario, Say, after selecting the Original menu option, if the screen throws the original menus in a jagged or distorted way, you can fix this by changing some settings.

Based on your car model and screen, the Device Factory settings will be under the Main Settings. Generally protected by a passkey, which is usually, one three one four, or eight eight eight eight, or zero one two six. Under Factory Settings, there would be usually some option to change the Original menu’s resolution, or a setting called, car type, in which you can select the actual resolution and screen size settings, suitable to your car.

After you have made any changes to the settings, it’s important to go back to the main menu, or android app tray which is located on top of all screens, and select the Original menu option, and see if the setting had fixed the display problem. If not, then you must change the settings to some other car type, or resolution to fix the distorted display problem.

In another scenario, say after selecting the Original menu option, if the screen throws up a blank screen, and if you are not able to see any menus at all, then you must check the physical connections again. The screen will be connected to 4 pins, or 6 pins, or 10 pins, LVDS connector. Check if the LVDS connections to the screen and from the car’s original media player are connected properly. If everything is connected correctly, the Original car menus will work on the screen. You could also disconnect the new android touchscreen and wiring, to reconnect the original screen and connections, and then check again if the original menus are displaying on the screen. If the menus work, then reconnect the Android screen and wiring to review the settings again.


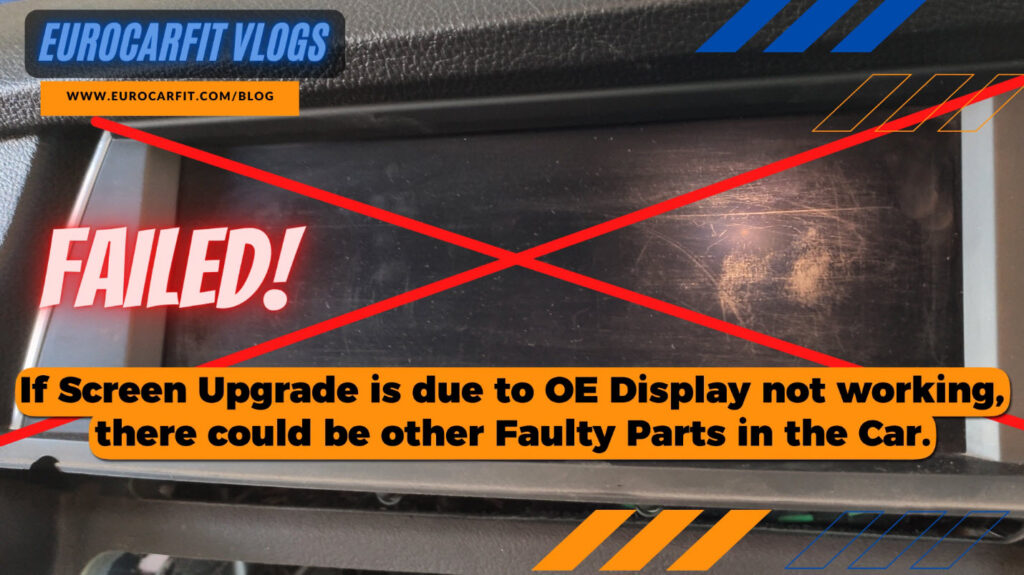
If you have just done a screen upgrade in your car because the display was not working at all earlier, then there could be another possibility, where things could be faulty. The original media player or in the case of some cars there is also a media interface box or chip. If any of these things are faulty, the screen upgrade may not work to its full potential. Android menus will load, but things will not be integrated.

In the case of a BMW, or an Audi, or a Volkswagen, or a Porsche car, you can do an aftermarket screen installation without disconnecting the car battery, though it’s recommended to disconnect any car battery during an aftermarket installation.

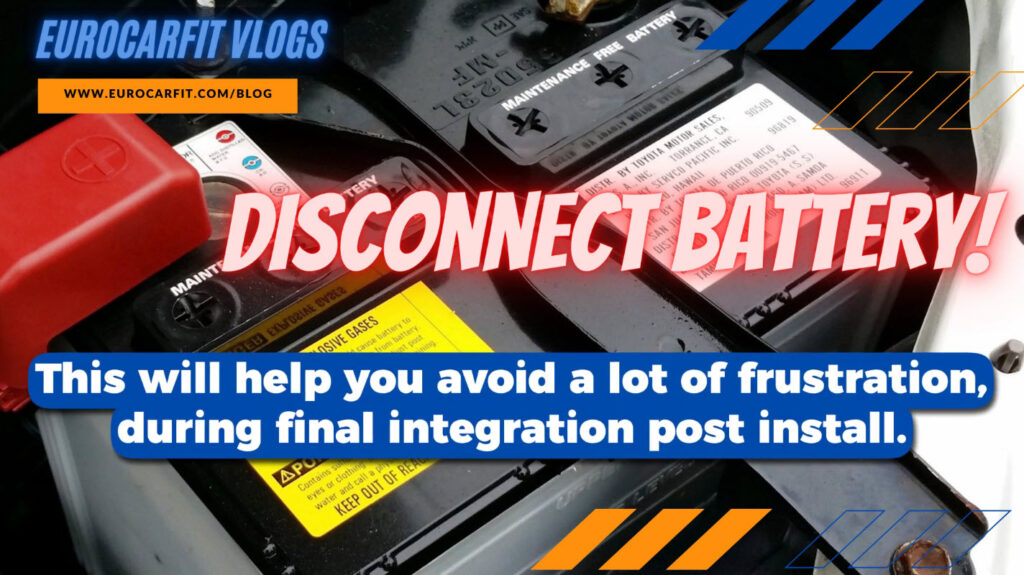
In the case of a Mercedes Benz android touchscreen upgrade, it’s mandatory to keep the car battery disconnected during the installation. This will help you avoid a lot of frustration during the final integration post-install. Connect back the battery only once all the connections, each and every wire has been connected for testing, or post-installation. The main T Harness wiring, the power sockets, the original car display sockets, and LVDS pins must all be connected as per specification. If any one of them is wrong, the canbus system on the car will not recognize the new device, and that can cause your Mercedes command controller to not work with the android menu options, and in some cases, it would not display the original command menus too.

Almost all Mercedes Benz compatible android screen kits, come with a plug-and-play wiring harness, with some optional combination of plugs labeled, A, AB, B, AB, etc. Some Mercedes car models may need a change of the combination of these plugs and connections for the Canbus to pair and work properly.
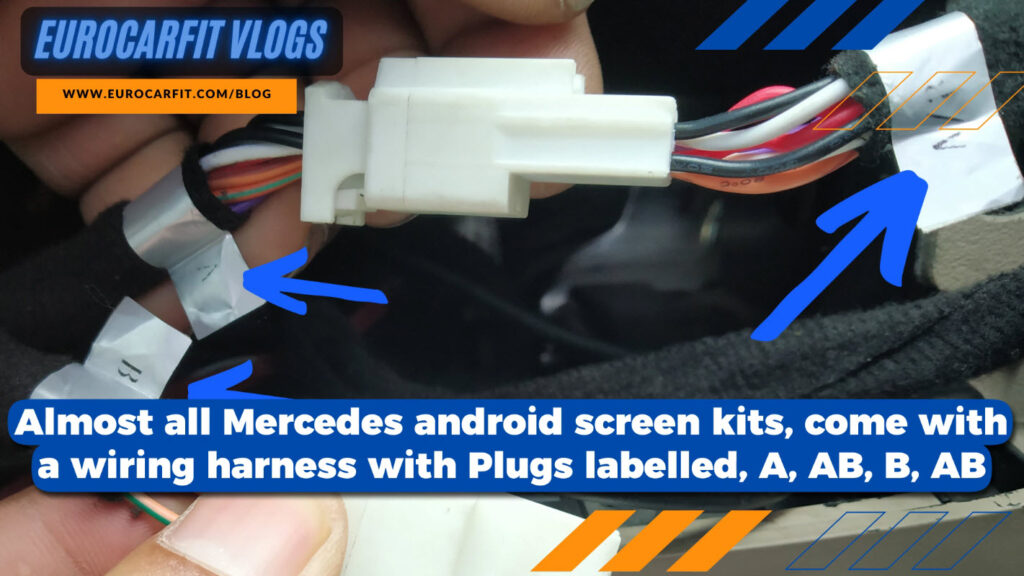
You must disconnect the power socket on the android screen every time you make a change of any of these plug configurations, in order to pair canbus correctly for the car you are working on.


Hope this Vlog is helpful for you, and our team of experienced technicians at EUROCARFIT are here to assist you!
Thank You!